Perdita on a display base for a client


 13th Hour Miniatures is now open!
13th Hour miniatures
 Ten Thunders Commission Complete
Gamers Lounge Bill's Ten Thunders ready to cause havoc in Malifaux
 Legion of Everblight
Legion of Everblight Commission


 The new Malifaux Gremlins are a blast to paint. You just get to experiment with colors and combinations and it can't turn out wrong.


 Dust Warfare miniatures come pre-primed in a dark grey color.
 First, thinly cover the flesh with P3 Midlund Flesh. Since we want old and newer zombies this should be done slapdash. Everything should be covered but the grey should be peaking through in some places.
  Wash the skin with GW Baal Red wash. Once again in a slap dash way. Newer zombies should have more red than older zombies.
 Here is poor Sabine. Not only was he unfortunate to be named Sabine, he was recently assigned to kitchen duty for the great Axis army. During a freak kitchen accident involving a chicken, an Allied bomb, and a spatula, Sabine was killed. But! Death doesn't stop service in the great Axis army!


 |
| Behold the zombie horde! |


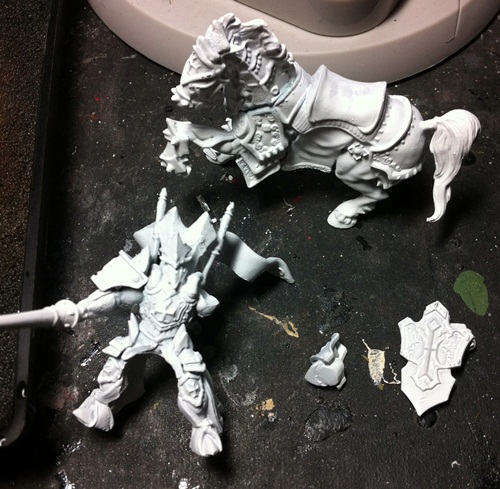 First I cleaned and primed the model white with Dupli-Color car primer. I find it to be thinner and more accepting to paint especially on these above table top quality models.
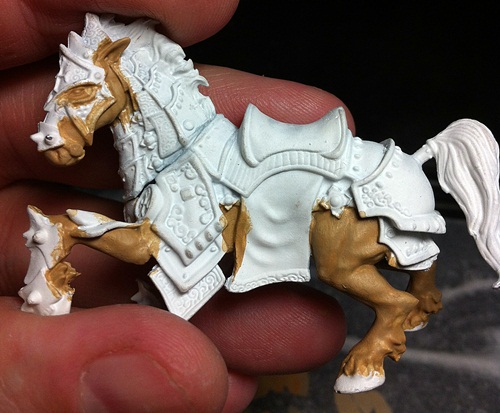 I then painted the horse P3 Hammerfall Khaki as a base. Slowly adding P3 Rucksack Tan, I highlighted in a stripe pattern to give the illusion of hair. Adding some GW Bleached Bone I finished the final highlights in the same stripe pattern. I got the idea from watching The Painting Clinic's YouTube video.
 I started the white portions of the armor by doing a preshade of P3 Thornwood Green mixed with P3 Menoth White Base. This gives solid shadows around the edges of the armor. Then, with straight thinned P3 Menoth White Base the color was slowly lightened moving from the edges in. I continued doing this adding P3 Menoth White Highlight decreasing the size of the highlight. Finally, a small amount of thinned P3 Marrow White was added to the upper most armor plates.
 You can see on the armor the gradual shading into the recesses of the armor plates. As the armor plates where being done the cloth was being done in the same manner except in the same stripping highlight to give the feel of texture that was not needed on the armor plates. Here I also applied P3 Sanguine Base to the saddle to give some color for the pictures.


 The purple mix had very little P3 Trollblood Base added to shift it to a lighter blue/purple. This was used to highlight the purple areas. GW Shining Gold was (roughly) dry brushed in the gold areas hitting only the raised areas. The eyes were painted Menoth Highlight.


